Now no more having back and forth conversations with your clients to set up a meeting. CompanyHub has introduced a new feature using which you can schedule a meeting with your clients with just a single click. Using this feature you can share your public calendar with your clients and they can book an appointment with you based on your availability in just a single click. Here’s how you can use this new feature –
Instead of having continuous back and forth conversations to setup a meeting time you can set it up using just a few clicks with the Calendar feature. With the Calendar feature you can share your calendar link showing your available slots with your clients and your client can choose a slot as per their convenience in a single click. Once booked, you and your client will both be notified regarding the booking. Also a task will be created in your CompanyHub account and your client will have an option to add the meeting time to their calendar in a click.
Your client will receive email after a meeting is booked.
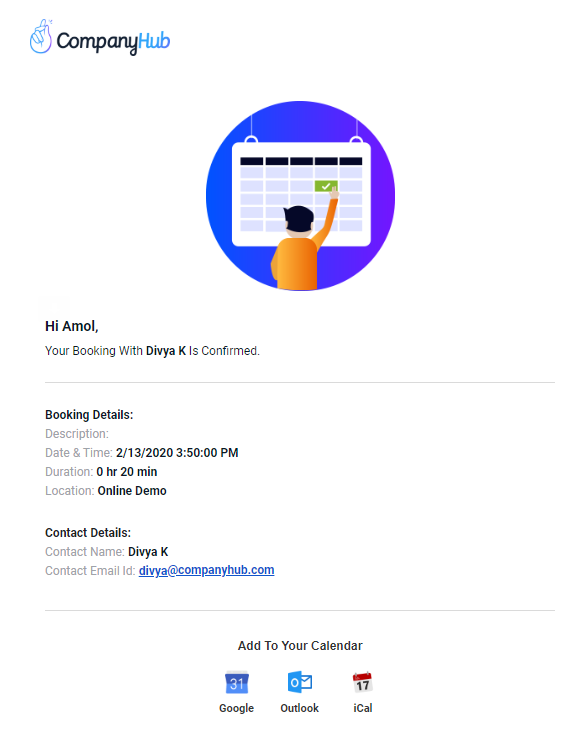
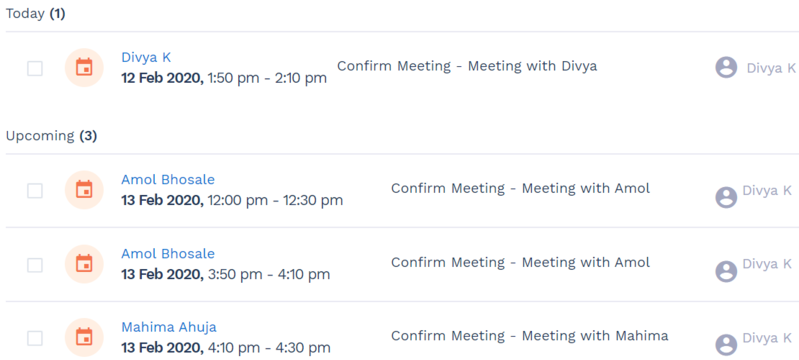
A task will be created in your CompanyHub account.
You can also set up meetings from the list view with just a click. To do that you just have to click on the mail icon next to the Contact’s name. On the compose screen, you will see an option to “Include Meeting Time”. Using this feature, you can easily choose time slots as per your convenience and send them to your Contacts. Your Contacts will have an option to choose either from the suggested slots or they can access your public calendar to check other timings as per their convenience.
You can also edit your available time slots using just a click while composing an email for your client. You can add time slots as per your requirement in your calendar.
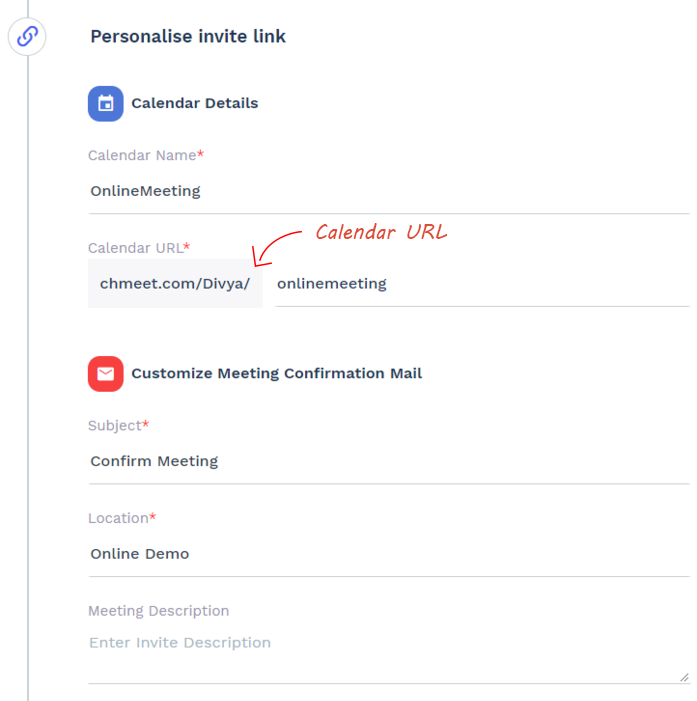
You can share your available times with your clients using a public calendar. Using the public calendar your clients can book an appointment as per their availability. You can customize the link for your public calendar as per your requirement. You can also create multiple calendars and personalize the URL for each calendar.
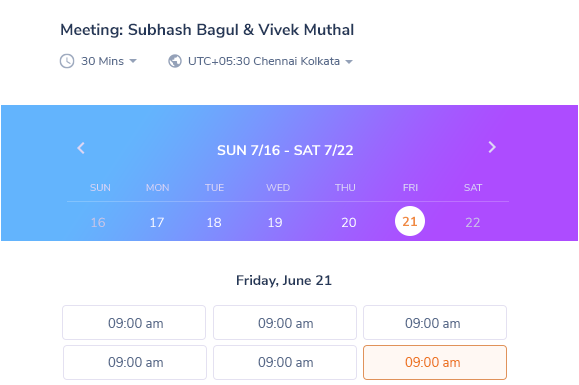
On the public calendar screen, your clients can see all your available and booked slots and as per their availability they can book an appointment. Once they choose a slot and click on “Book Meeting” they will be directed to the next screen where they can enter their personal/contact details. Once booked you and your client will be notified regarding the meeting details and a task will be created in your CompanyHub account with (of) that particular time and date.
You can enable the calendar features using the following steps:
In your email compose window in the list view, you will find an option to “Include Meeting Time”. Once you click on it, you’ll find a pop-up screen and on that screen you’ll find a “Create Calendar” button. Once you click on “Create Calendar” you’ll be redirected to the next page where you can set up your availability and time slots.
You can also enable the calendar feature by going to Settings Sync Email and Calendar Create Calendar.
-
Select your available times
Once you enable the calendar feature you’ll be redirected to the next screen where you can add your availability and free time slots for appointments/bookings. On this screen, you can just drag and drop to select your available time slots for each day. If you wish you can choose to repeat the same time slots for a selected period of time by clicking on “Repeat Availability?”
-
Set default meeting duration
Once you select your availability, you can scroll down to find the default “Meeting Duration” for each meeting. Based on the meeting duration the system will automatically create slots in the given available times, like for example, you have chosen slots between 9-10 am and set the duration as 30 minutes then the system will automatically setup the slots in the given available times as 9 – 9.30 am and 9.30 – 10 am.
-
Customize the details you gather from your contact / client
Once you click on Next, you will find a section where you can add fields to gather information from your clients. Please note that these fields refer to the fields in Contacts table, that is, only those fields that are present in the Contacts records can be added.
-
Personalise your Calendar link
In the next section, you can personalise the public calendar link as per your requirements. Please note that this link id can be set only once for each calendar. In the “Calendar Details” section, you can add a name for your calendar which will be added to your public calendar URL.
-
Customize the details of the confirmation mail
In the next section which is “Customize Meeting Confirmation Mail” you can add the subject and the location for the email which will be sent as soon as the client books an appointment. If you wish you can also add a description to that mail.
While setting up the calendar, the system automatically detects your timezone based on the Country that you have added while setting up your CompanyHub account. If you wish to change this you can easily do that by clicking on the dropdown present on the right hand side of the popup. Once you choose a timezone, the available time slots will be updated accordingly.
In case if your client is in a different timezone, they can choose their timezone from the calendar screen itself. Once they add their time zone, the available time slots will be updated accordingly. Your available time slots will be reflected in your public calendar and your clients will be able to see the timings as per their timezone. Hence reducing your client’s hustle to change time zones.